








Ubuntu Studio Installer can add Ubuntu Studio’s benefits to any installation of Ubuntu or its official flavors* so that you can use whatever desktop environment you prefer and gives you a curated selection of packages to fit your workflow, whether you’re a graphics artist, audio engineer, musician, publisher, photographer, or video producer.
Note that this does not convert your installation into Ubuntu Studio, but simply adds its benefits onto your existing installation. For regular support you should still seek help from the help channels of the flavor you installed.
Installing
To get Ubuntu Studio Installer, you must first have installed Ubuntu or an official flavor. Once you have done that, simply open a terminal window and type:
sudo apt install ubuntustudio-installer
In Ubuntu 22.04 LTS, this will bring in other tools, such as Studio Controls which is required for audio configuration prep, which is done after Ubuntu Studio Installer has been run.
Using Ubuntu Studio Installer (Ubuntu 24.04 LTS and later)
To use, simply click on the icon for Ubuntu Studio Installer, or find it in your launcher/dash.
Once it is open, you will see a window like this:
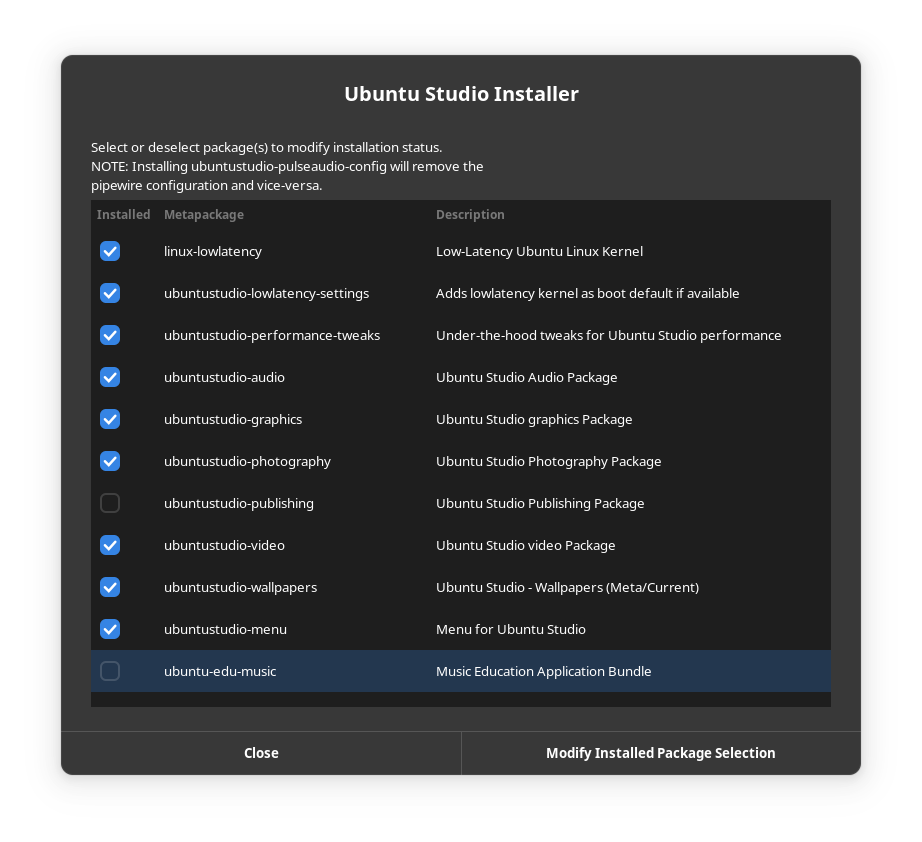
Simply check or uncheck the components you wish to add or remove.
Once you have your selection(s) made, click “Modify Installed Package Selection”. If instructed to log-out and log-in after installer completes, do so. This simply adds the real-time audio permissions to your user if you don’t have them already. If you don’t need real-time audio permissions, then this will have no effect on your workflow.
Once you have your selection(s) made, click “Install”. If instructed to log-out and log-in after installer completes, do so. This simply adds the real-time audio permissions to your user if you don’t have them already. If you don’t need real-time audio permissions, then this will have no effect on your workflow.
Mauro Gaspari has created an excellent tutorial on FrontPageLinux.com of a typical installation of Ubuntu Studio’s audio system using this method.
That’s it! You are ready to create. We’ve done all the heavy lifting, so you don’t have to.
*Note: unofficial Ubuntu derivatives (those NOT listed as official flavors) are not supported, nor is Ubuntu Server.
0 comments:
Post a Comment