


To learn more about Budgie DE visit: Budgie Project Page
Before installing, check the minimum specified hardware, so that you can have flawless experience.
Here are the minimum specs for running Ubuntu Budgie:
System Requirements.
Processor speed: 1.5Ghz
Memory: 2GB of RAM
Hard Disk space: 60GB

Note: In 90% of cases you are good to go with those and specs above. However, some machines have specific hardware that requires you to check the driver before installation which is usually related to Broadcom Network cards found in laptops.
Before installation prepare the installation medium. You can choose either CD or DVD or use USB to serve as one. If you are using CD or DVD, use your favorite CD/DVD writer app to write the image to it. Windows users can use ImgBurn or Nero Burner and other similar burner apps. Mac users can use Etcher. If you are using USB as your installation medium you can use UNetBootin to make bootable USB installation drive.
Here are some tools that you can use to make bootable USB:
USB Tools.
1. Rufus - Windows only
2. Universal USB Installer
3. UnetBootin
4. Ubuntu Startup Disk Creator
5. RMPrepUSB
6. Etcher - Multi-platform - Recommended for new users
7. WinSetupFromUSB
8. RMPrepUSB
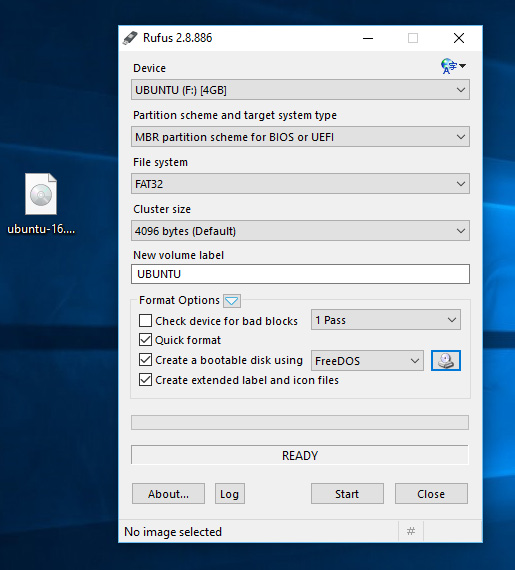
Since there is not yet Ubuntu Budgie as an option you must select Diskimage option, and then specify path to where you've downloaded iso. (Usually Downloads folder) Choose your USB drive and click ok. Note: When using Windows, be sure to check if UnetBootin has selected the correct drive letter.
Failure to do so may result in loss of data. After you click ok, UnetBootin will start extracting ISO to USB. Congratulation, if everything went right you've made your bootable installation USB drive.
After you're done with making bootable medium, restart your computer and choose to boot from bootable USB drive. To boot from bootable USB drive press F8 and select your USB which will be presented alongside other HDD and CD-DVD drives. Note: Some computers and laptops, depending on the Motherboard have different function key assigned to access bootable menu. Some will show how to access boot options while booting, while others will require you to check each button by doing trial and error until you find the right one. If any of button doesn't have that function, head over to BIOS settings by pressing DEL button while booting, and go to Boot Device settings.
Depending on your motherboard and BIOS software, this may be called something different. After you load the live version of Ubuntu Budgie, you can choose to load the operating system for testing and preview by pressing "Try Ubuntu Budgie without installing", or press "Install Ubuntu Budgie" to go straight for installation. If you've chosen first option, you will be still able to install the UB by pressing Install Ubuntu Budgie icon located on desktop.
After you've setup your location, keyboard, and language settings, up next is drive partitioning. You have few different options. Depending on free space on HDD and how many HDD's you have you can setup 2 system on same HDD or each on separate drive. Linux based systems use GRUB loader to boot.
If you install it alongside other OS on same drive Grub will replace default bootloader, adding both newly installed Linux OS and old system on boot list to choose which to boot into. For new users it is recommended to choose install alongside currently installed system. If you want to replace your OS with Ubuntu Budgie you can also choose that option. Something else option is for more advanced users.
If you choose it be sure to make following mounting drives. / - which is root space where all software required for OS is stored. /home - partition used for most of the software you install and storing everyday files. /boot partition - where boot files will be stored. /swap - partition used for accessing and using hard disk space as additional memory when using near 99% of your RAM.
SIZES:
/ - 30GB or more
/swap - should be the same as your ram size
- Note: Starting from 17.04 Ubuntu doesn't use swap partition and instead uses swap files, so you don't need to create swap partition.
/boot - 500MB
/home - rest of your hard disk space.
If you don't choose manual partitioning, (something else option), installer will automatically partition your drive for installation. Each partition should be formated to ext4. To make them erase NTFS drive and then make 4 partitions with those mounting points. Swap partition needs to be set as swap partition type instead of ext4. Installer will ask you if you are sure before proceeding to installation. Note: If you have more than 2 HDD pay attention to where the bootloader is going to be installed since it could potentially mess your install. Next, choose username PC name and password. If you choose you can also encrypt your home partition for additional security.
Note: Make sure you've chosen additional media that contains codes so that you could play your media files right after installation.Sit back and relax, the installation will also download updates if you choose that option which could extend install time by few minutes depending on your Internet connection speed. When done, you can restart into newly installed Ubuntu Budgie.

Do you consider this article interesting? Share it on your network of Twitter contacts, on your Facebook wall or simply press "+1" to suggest this result in searches in Google, Linkedin, Instagram or Pinterest. Spreading content that you find relevant helps this blog to grow. Thank you!
Before installing, check the minimum specified hardware, so that you can have flawless experience.
Here are the minimum specs for running Ubuntu Budgie:
System Requirements.
Processor speed: 1.5Ghz
Memory: 2GB of RAM
Hard Disk space: 60GB
Note: In 90% of cases you are good to go with those and specs above. However, some machines have specific hardware that requires you to check the driver before installation which is usually related to Broadcom Network cards found in laptops.
Before installation prepare the installation medium. You can choose either CD or DVD or use USB to serve as one. If you are using CD or DVD, use your favorite CD/DVD writer app to write the image to it. Windows users can use ImgBurn or Nero Burner and other similar burner apps. Mac users can use Etcher. If you are using USB as your installation medium you can use UNetBootin to make bootable USB installation drive.
Here are some tools that you can use to make bootable USB:
USB Tools.
1. Rufus - Windows only
2. Universal USB Installer
3. UnetBootin
4. Ubuntu Startup Disk Creator
5. RMPrepUSB
6. Etcher - Multi-platform - Recommended for new users
7. WinSetupFromUSB
8. RMPrepUSB
Since there is not yet Ubuntu Budgie as an option you must select Diskimage option, and then specify path to where you've downloaded iso. (Usually Downloads folder) Choose your USB drive and click ok. Note: When using Windows, be sure to check if UnetBootin has selected the correct drive letter.
Failure to do so may result in loss of data. After you click ok, UnetBootin will start extracting ISO to USB. Congratulation, if everything went right you've made your bootable installation USB drive.
After you're done with making bootable medium, restart your computer and choose to boot from bootable USB drive. To boot from bootable USB drive press F8 and select your USB which will be presented alongside other HDD and CD-DVD drives. Note: Some computers and laptops, depending on the Motherboard have different function key assigned to access bootable menu. Some will show how to access boot options while booting, while others will require you to check each button by doing trial and error until you find the right one. If any of button doesn't have that function, head over to BIOS settings by pressing DEL button while booting, and go to Boot Device settings.
Depending on your motherboard and BIOS software, this may be called something different. After you load the live version of Ubuntu Budgie, you can choose to load the operating system for testing and preview by pressing "Try Ubuntu Budgie without installing", or press "Install Ubuntu Budgie" to go straight for installation. If you've chosen first option, you will be still able to install the UB by pressing Install Ubuntu Budgie icon located on desktop.
Read also: Ubuntu 17.04 Zesty Zapus flavors are now available to download, including Ubuntu Budgie.STEP 2.
After you've setup your location, keyboard, and language settings, up next is drive partitioning. You have few different options. Depending on free space on HDD and how many HDD's you have you can setup 2 system on same HDD or each on separate drive. Linux based systems use GRUB loader to boot.
If you install it alongside other OS on same drive Grub will replace default bootloader, adding both newly installed Linux OS and old system on boot list to choose which to boot into. For new users it is recommended to choose install alongside currently installed system. If you want to replace your OS with Ubuntu Budgie you can also choose that option. Something else option is for more advanced users.
If you choose it be sure to make following mounting drives. / - which is root space where all software required for OS is stored. /home - partition used for most of the software you install and storing everyday files. /boot partition - where boot files will be stored. /swap - partition used for accessing and using hard disk space as additional memory when using near 99% of your RAM.
SIZES:
/ - 30GB or more
/swap - should be the same as your ram size
- Note: Starting from 17.04 Ubuntu doesn't use swap partition and instead uses swap files, so you don't need to create swap partition.
/boot - 500MB
/home - rest of your hard disk space.
If you don't choose manual partitioning, (something else option), installer will automatically partition your drive for installation. Each partition should be formated to ext4. To make them erase NTFS drive and then make 4 partitions with those mounting points. Swap partition needs to be set as swap partition type instead of ext4. Installer will ask you if you are sure before proceeding to installation. Note: If you have more than 2 HDD pay attention to where the bootloader is going to be installed since it could potentially mess your install. Next, choose username PC name and password. If you choose you can also encrypt your home partition for additional security.
Note: Make sure you've chosen additional media that contains codes so that you could play your media files right after installation.Sit back and relax, the installation will also download updates if you choose that option which could extend install time by few minutes depending on your Internet connection speed. When done, you can restart into newly installed Ubuntu Budgie.
If you liked this article, subscribe to the feed by clicking the image below to keep informed about new contents of the blog:
0 comments:
Post a Comment