







Ekos is an advanced cross-platform (Windows®, Mac® OS, Linux®) observatory control and automation tool with a particular focus on Astrophotography. It is based on a modular extensible framework to perform common astrophotography tasks. This includes highly accurate GOTOs using astrometry solver, ability to measure and correct polar alignment errors, auto-focus & auto-guide capabilities, and capture of single or stack of images with filter wheel support. Ekos is shipped with KStars.
Ekos introductory video
Features:
-
Control your telescope, Camera (& DSLRs), filter wheel, focuser, guider, adaptive optics unit, and any INDI-compatible auxiliary device from Ekos.
-
Built-in native autoguiding with support for automatic dithering between exposures and support for Adaptive Optics devices in addition to traditional guiders, including an experimental AI-assisted predictive guiding mode.
-
Extremely accurate GOTOs using astrometry.net solver (both Online and Offline solvers supported).
-
Load & Slew: Load a FITS image, slew to solved coordinates, and center the mount on the exact image coordinates in order to get the same desired frame.
-
Measure & Correct Polar Alignment errors using astrometry.net solver.
-
Easy to use Polar Alignment Assistant tool. A very quick and reliable tool to polar align your German Equatorial Mount!
-
Capture and record video streams in SER format.
-
Completely automated scheduler to control all your observatory equipment, select the best targets for imaging given current conditions and constraints, monitor weather conditions, and capture your data while you are away!
-
Smart Dark Library: All your dark frames with different binning/temperature/frame settings are saved for future use. Ekos reuses dark frames intelligently without taking unnecessary captures. You can configure how long you want to reuse all the dark frames.
-
Define multiple driver profiles for local and remote setups. Switch among them easily.
-
Auto and manual focus modes using Half-Flux-Radius (HFR) method.
-
Automated *unattended* meridian flip. Ekos performs post meridian flip alignment, calibration, focusing, and guiding to resume the capture session.
-
Automatic focus between exposures when a user-configurable HFR limit is exceeded.
-
Powerful sequence queue for batch capture of images with optional prefixes, timestamps, filter wheel selection, and much more!
-
Export and import sequence queue sets as Ekos Sequence Queue (
.esq) files. -
Center the telescope anywhere in a captured FITS image or any FITS with World Coordinate System (WCS) header.
-
Automatic flat field capture, just set the desired ADU and let Ekos does the rest!
-
Automatic abort and resumption of exposure tasks if guiding errors exceed a user-configurable value.
-
Support for dome slaving.
-
Complete integration with KStars Observation Planner and SkyMap.
-
Fully scriptable via D-Bus.
-
Integrate with all INDI native devices.
Ekos Setup
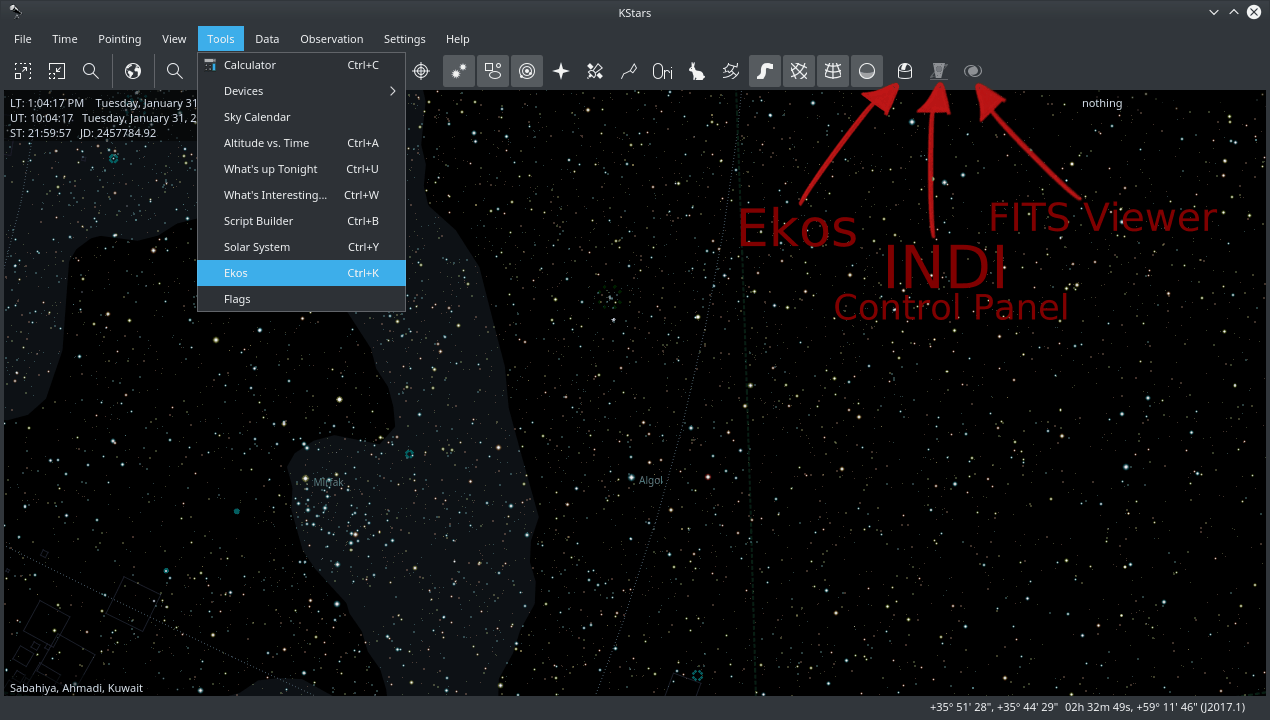
Ekos is a part of KStars. KStars/Ekos is already included with your StellarMate gadget. It is also available for Linux®, Mac® OS, and Windows® if you want to install on your primary machine. After you run KStars on your PC or on StellarMate (Either directly via HDMI or via VNC), Ekos can be accessed from the Tools menu or via the Ekos on the main toolbar, or by a keyboard shortcut (Ctrl + K). In addition to the Ekos window, KStars provides a more detailed INDI Control Panel where you can directly set and control the device parameters.
When running Ekos, it is not necessary to start INDI Server via StellarMate Web Manager as Ekos manages that transparently.
User Interface
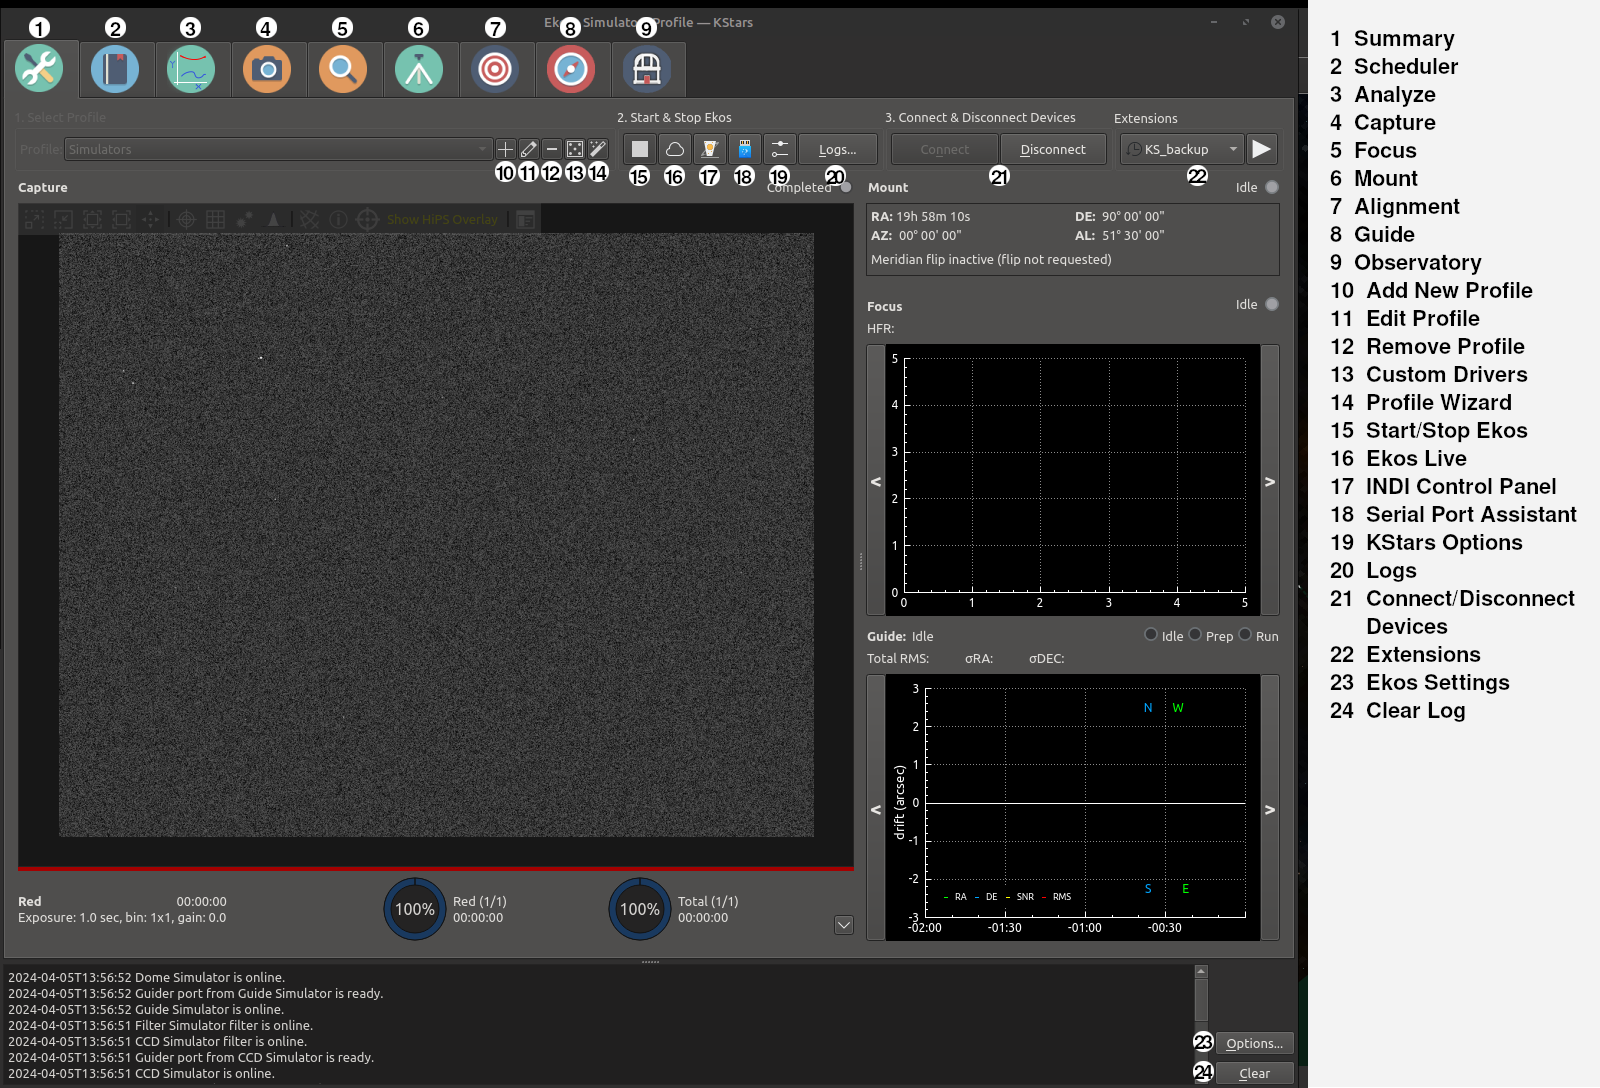
Ekos Astrophotography Tool is organized into several Modules. A module is a set of functions and tasks for a particular step in astrophotography and/or data acquisition. Currently, the following modules are included with Ekos:
-
Setup & Summary Module
-
Scheduler Module
-
Analyze Module
-
Capture Module
-
Focus Module
-
Alignment Module
-
Guide Module
-
Mount Module
Each module has its own tab and icon in the graphical user interface as illustrated in the screenshot below:
- Summary & Setup Module
-
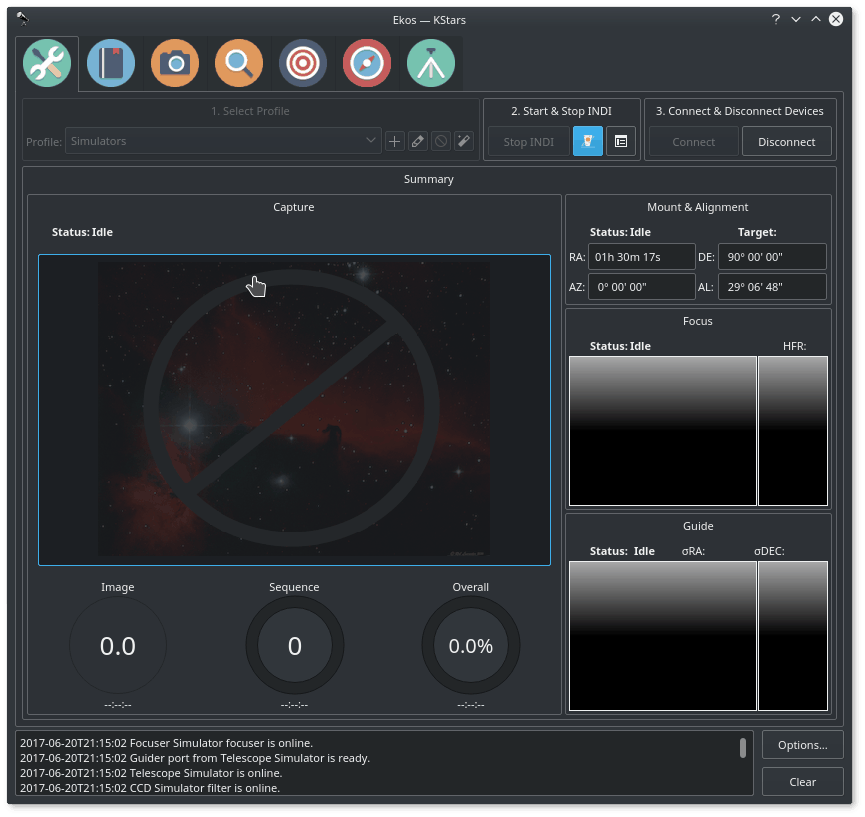
As its name suggests, this is where you will create and manage your equipment profile, and connect to your devices. It also provides a summary view where the capture progress along with the focus & guide operations is displayed in a compact format to convey the most important information relevant to the user. If any extensions are installed, the selection and start/stop controls will be shown.
- Scheduler Module
-
After mastering Ekos, users are encouraged to learn how to use the Scheduler module since it facilitates the complete observation process greatly. It enables you to select multiple targets, specify which conditions and requirements to be met, and what frames are required for capture. Afterwards the scheduler intelligently calculates the best observation time for each object and then proceed to control the complete observatory from startup to shutdown.
- Analyze Module
-
Analyze displays a high-level summary of what happened during an imaging session. It shows plots and graphs describing the many captures takes during a night, the focus sessions, the guiding, mount movement, meridian flips, etc. Use it to get a feel of “what happened last night” or to see the current state of the system.
- Capture Module
-
This is the primary module for camera & filter wheel control. Create imaging sequences, capture previews, and watch video streams. It supports rotator control and can automatically capture flat frames in a number of scenarios.
- Focus Module
-
Measure the sharpness of your images in the focus module by calculating Half-Flux-Radius. The lower the HFR, the sharper the image becomes. You can run the focus module with or without a focuser. With an electronic focuser, you can run an autofocus operation where Ekos iterates and calculates the optical focus position.
- Guide Module
-
To achieve long exposure astrophotography, guiding is necessary to ensure the image is locked and stabilized for the complete duration of the exposure duration. Deviations from the frame with time can lead to blurry images and star trails. In the guide module, it can automatically select a suitable guide star and then lock the mount to always keep that star in its position. If the guide module detects any deviation from this locked position, it sends correction pulses to the mount to bring it back to the original position.
- Mount Module
-
Mount control can be either done via the Sky Map interactively or via the Mount Control Panel in the mount module. Configure telescope properties (focal length & aperture) for both your primary imaging telescope and guide scope. However, it is recommended to select the telescopes in the equipment profile and not change the values directly in the mount module.
0 comments:
Post a Comment