







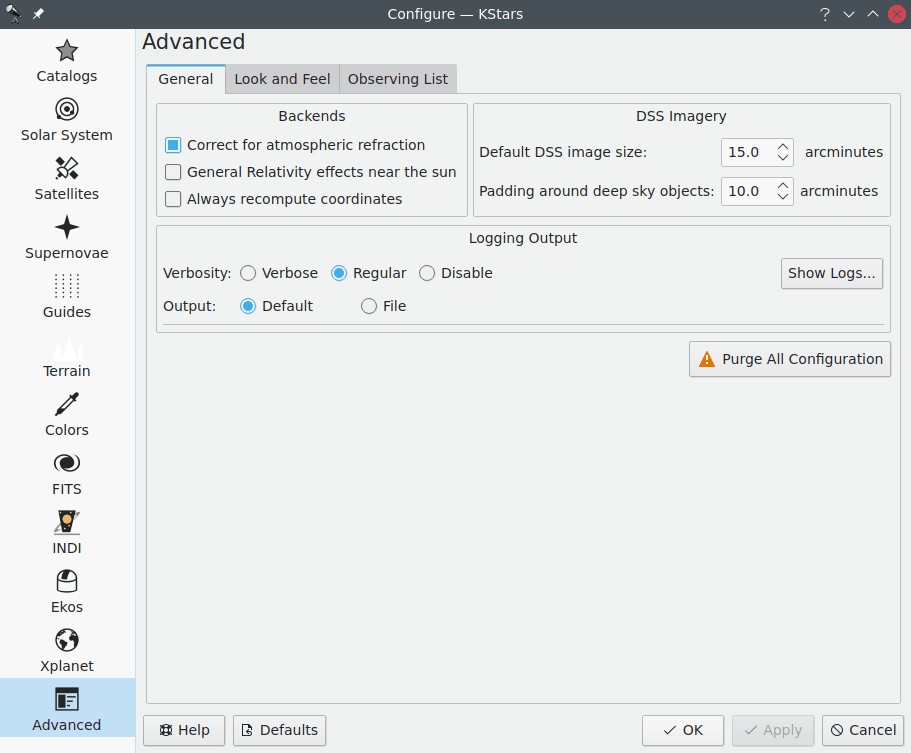
The Advanced page provides fine-grained control over the more subtle behaviors of KStars.
The Correct for atmospheric refraction checkbox controls whether the positions of objects are corrected for the effects of the atmosphere. Because the atmosphere is a spherical shell, light from outer space is “bent” as it passes through the atmosphere to our telescopes or eyes on the Earth’s surface. The effect is largest for objects near the horizon, and actually changes the predicted rise or set times of objects by a few minutes. In fact, when you “see” a sunset, the Sun’s actual position is already well below the horizon; atmospheric refraction makes it seem as if the Sun is still in the sky. Note that atmospheric refraction is never applied if you are using Equatorial coordinates.
The Use animated slewing checkbox controls how the display changes when a new focus position is selected in the map. By default, you will see the sky drift or “slew” to the new position; if you uncheck this option, then the display will instead “snap” immediately to the new focus position.
If the Attach label to centered object checkbox is selected, then a name label will automatically be attached to an object when it is being tracked by the program. The label will be removed when the object is no longer being tracked. Note that you can also manually attach a persistent name label to any object with its popup menu.
There are three situations when KStars must redraw the sky display very rapidly: when a new focus position is selected (and Use animated slewing is checked), when the sky is dragged with the mouse, and when the time step is large. In these situations, the positions of all objects must be recomputed as rapidly as possible, which can put a large load on the CPU. If the CPU cannot keep up with the demand, then the display will seem sluggish or jerky. To mitigate this, KStars will hide certain objects during these rapid-redraw situations, as long as the Hide objects while moving checkbox is selected. The timestep threshold above which objects will be hidden is determined by the Also hide if time step larger than: timestep-spinbox. You can specify the objects that should be hidden in the Configure Hidden Objects section.
Developer
The
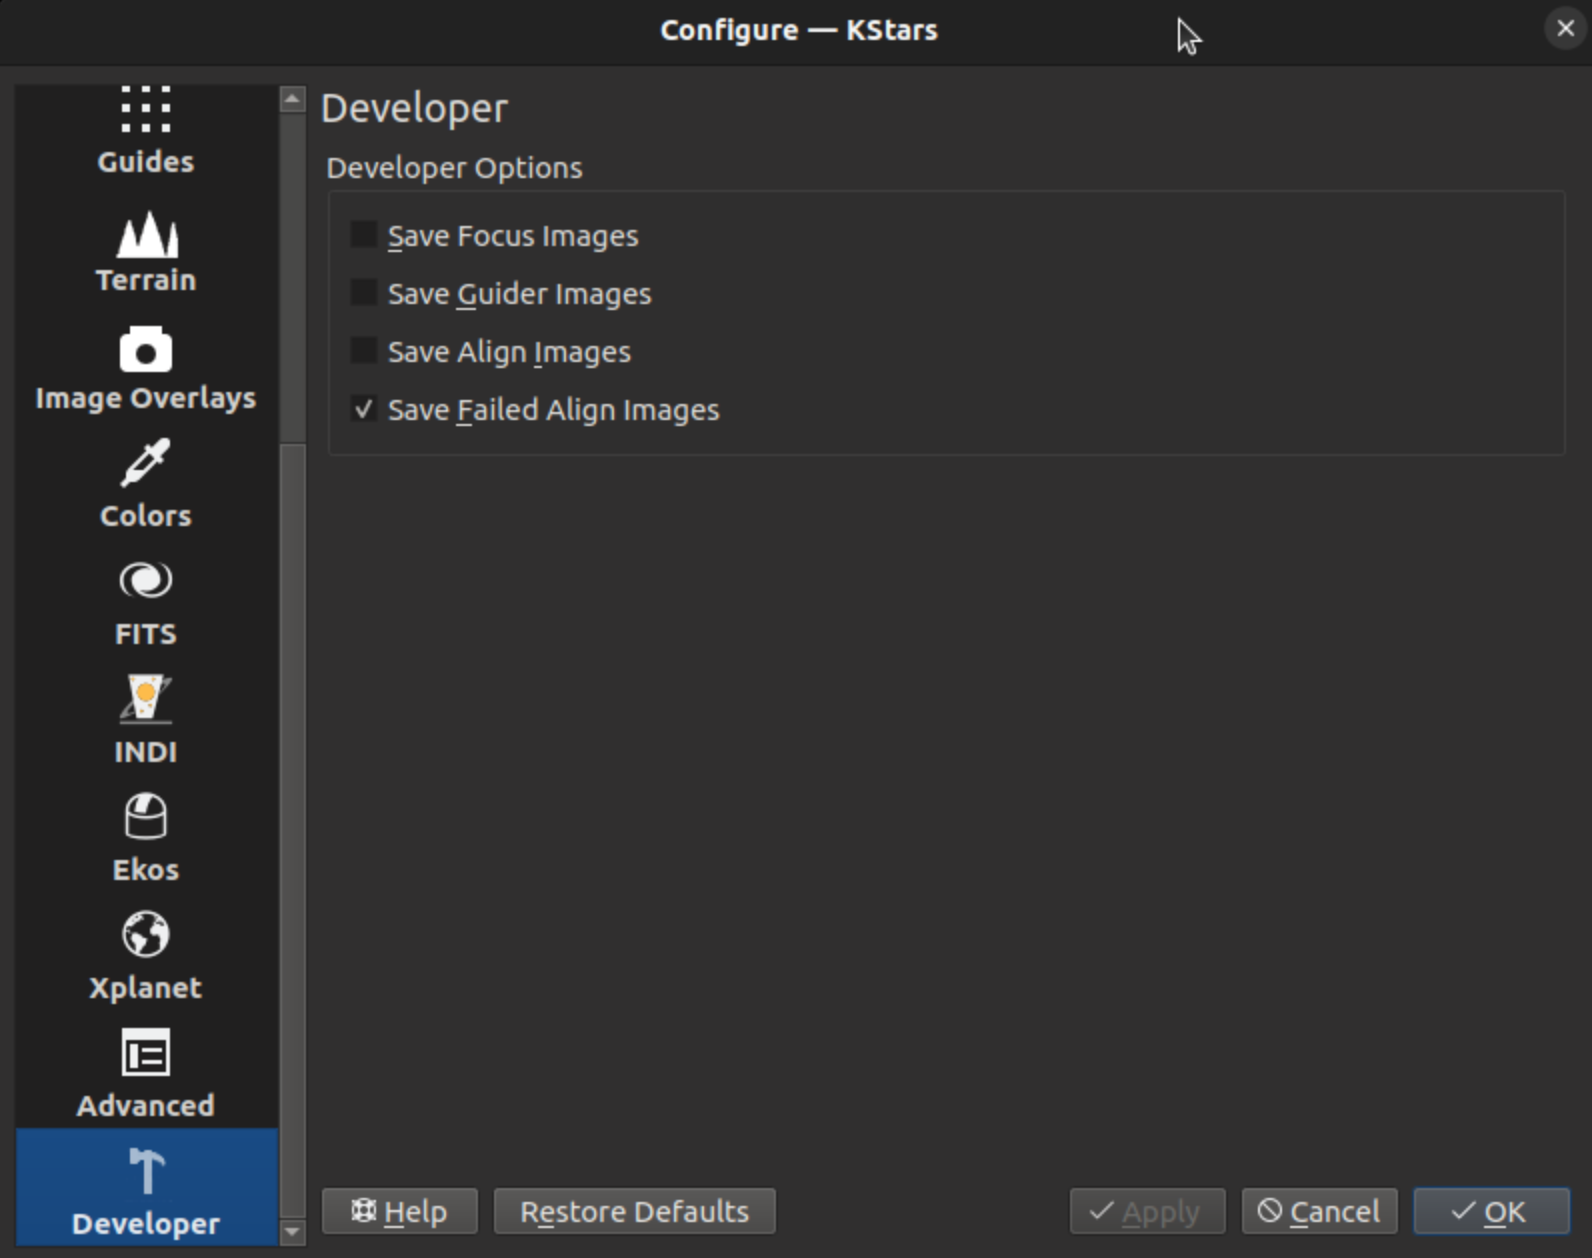
Developerpage provides a few checkboxes that can help debug issues with KStars. There are checkboxes for saving images in logging directories that might help debug issues. Of course, saving images can take up disk space and should be used judiciously.The images that can be saved are
all focus images,
all guider images,
all align images, and
align images where the plate-solving failed.
The images are all saved in folders parallel to the main logging directory. They are in folders named guide, autofocus, align, and align/failed.
Customizing the Display
There are several ways to modify the display to your liking.
Toggle whether the Info Boxes are drawn in the
Settings→Info Boxessubmenu. In addition, you can manipulate the three Info Boxes with the mouse. Each box has additional lines of data that are hidden by default. You can toggle whether these additional lines are visible by double-clicking a box to “shade” it. Also, you can reposition a box by dragging it with the mouse. When a box hits a window edge, it will “stick” to the edge when the window is resized.Toggle whether the Toolbars are drawn in the
Settings→Toolbars Shownsubmenu. Like most KDE toolbars, they can also be dragged around and anchored on any window edge, or even detached from the window completely if they are unlocked.Select a different color scheme in the
Settings→Color Schemessubmenu. There are four predefined color schemes, and you can define your own in the Configure - KStars window.Choose an “FOV Symbol” using the
Settings→FOV Symbolssubmenu. FOV is an acronym for “field-of-view”. An FOV symbol is drawn at the center of the window to indicate where the display is pointing. Different symbols have different angular sizes; you can use a symbol to show what the view through a particular telescope would look like. For example, if you choose the “7x35 Binoculars” FOV symbol, then a circle is drawn on the display that is 9.2 degrees in diameter; this is the field-of-view for 7x35 binoculars.You can define your own FOV symbols (or modify the existing symbols) using the
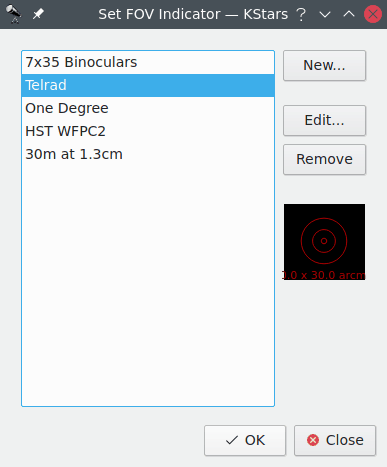
Edit FOV Symbols...menu item, which launches the FOV Editor:
The list of defined FOV symbols is displayed on the left. On the right are buttons for adding a new symbol, editing the highlighted symbol’s properties, and removing the highlighted symbol from the list. Note that you can even modify or remove the four predefined symbols (if you remove all symbols, the four defaults will be restored the next time you start KStars). Below these three buttons is a graphical preview display showing the highlighted symbol from the list. When the
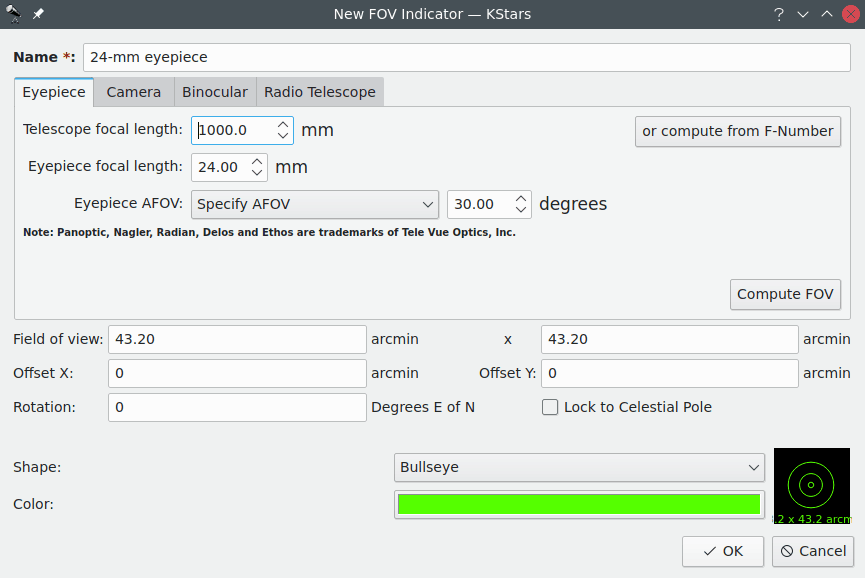
New...orEdit...button is pressed, theNew FOV Indicatorwindow is opened:
This window lets you modify the four properties that define a FOV symbol: name, size, shape, and color. The angular size for the symbol can either be entered directly in the
Field of Viewedit box, or you can use the Eyepiece/Camera Tabs to calculate the field-of-view angle, given parameters of your telescope/eyepiece or telescope/camera setup. The five available shapes are: Square, Circle, Crosshairs, Bullseye and Semitransparent circle. Once you have specified all four parameters, pressOk, and the symbol will appear in the list of defined symbols. It will also be available from theSettings→FOV Symbolssubmenu.
0 comments:
Post a Comment