


Multiple Displays
 Ubuntu MATE makes connecting multiple monitors and changing the resolution quite easy. Changing monitor preferences is accomplished by selecting Menu > Control Center > Displays in the menus.
-
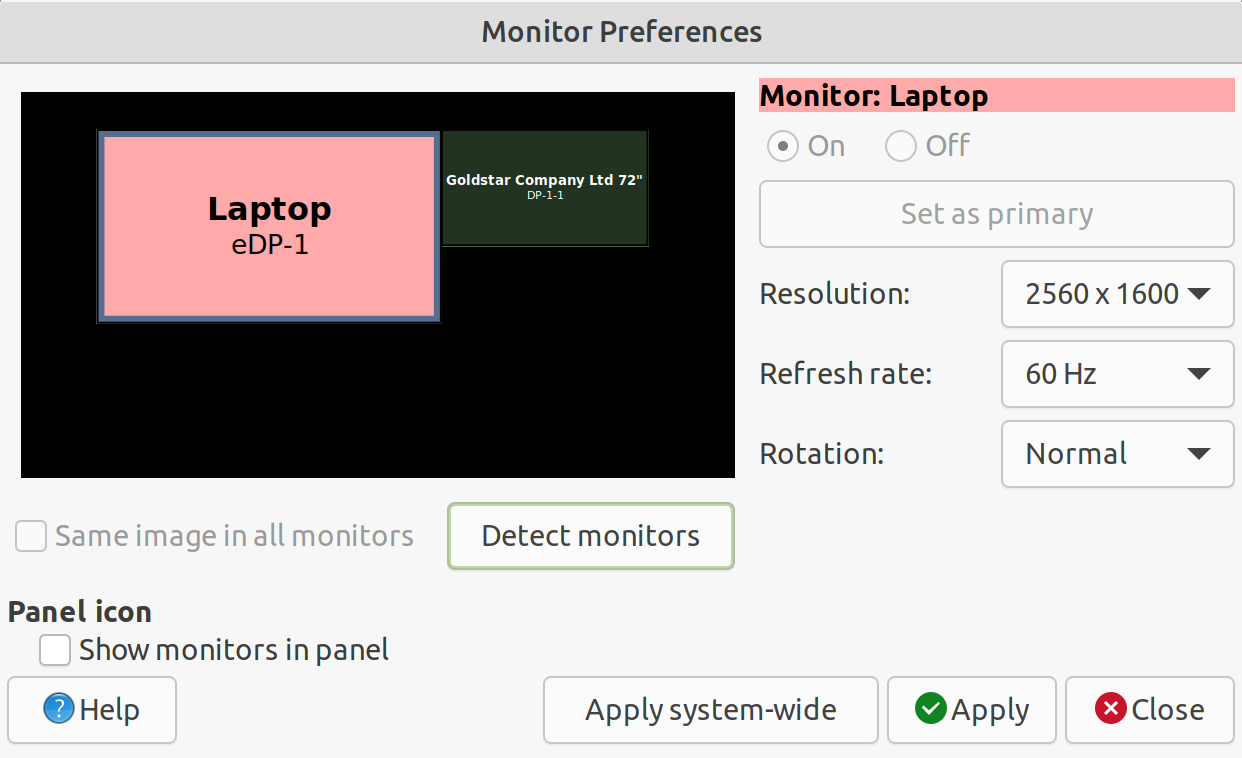
When you connect a second monitor, it will likely connect automatically. If it doesn't, simply click on the black rectangle that represents the second monitor and choose the On setting. When the display is switched to "On" the rectangle will be in color.
-
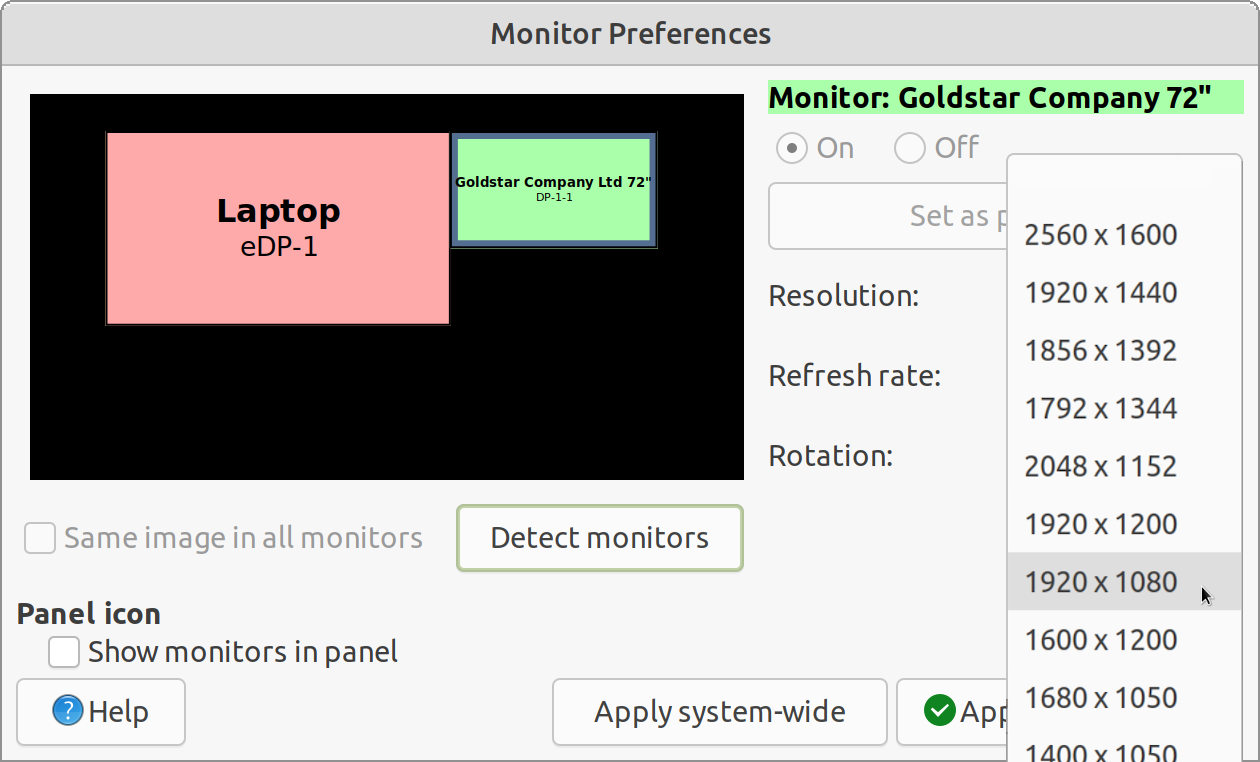
Select the resolution settings you prefer. The list includes all of the resolutions that the monitor is capable of displaying. In this example, an HDMI cable is used to connect a 1080P television as a monitor.
-
To apply the settings, click the Apply button.
-
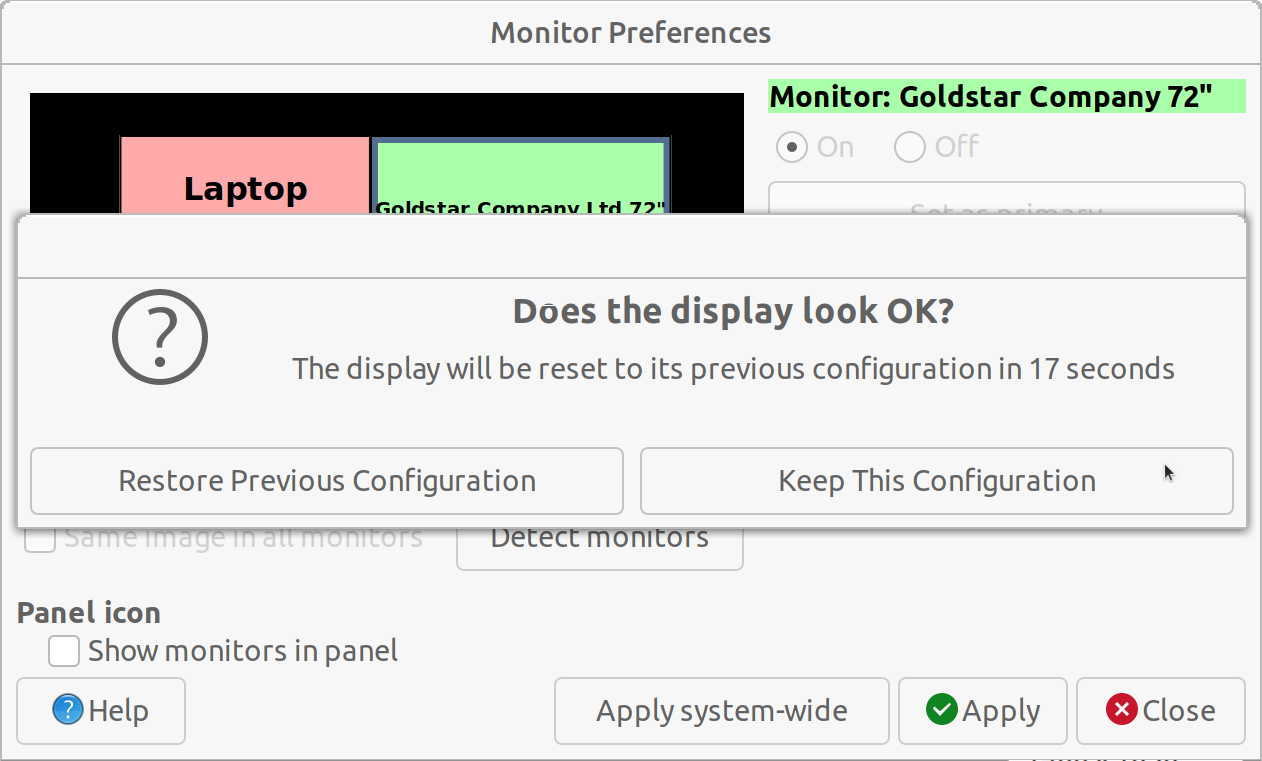
The new configuration is set temporarily. If you don't confirm the settings, for example, if the settings don't work properly, after a short delay the configuration will revert to the previous settings.
-
Click on Keep This Configuration to confirm your changes.
High-Resolution Monitors
Linux support for high-resolution computer displays (HiDPI or 4K displays) is still being perfected . However, with the 18.04 release, the Ubuntu MATE team has released a utility that automatically detects your 4K display and sets the appropriate screen scaling for you. Without scaling, you may find that 4K displays, like screens on such modern laptops as the Dell XPS 13, or external 4K monitors have tiny icons and fonts that make them difficult to see and to use. With HiDPI support, Ubuntu MATE lets you take advantage of the full resolution of your beautiful 4K display and still have everything readable.
Of course, Ubuntu MATE allows you to make the decision as to whether to use HiDPI scaling or not. Here is how to make changes to the HiDPI settings.
-
Before you begin modifying your screen settings, if it wasn't selected by default, you can use the instructions in the previous section to ensure that your display is set to the highest resolution available. If supported, this will be the 4K resolution for your HiDPI display.
-
Open the MATE Tweak application by selecting Menu > Control Center > MATE Tweak .
-
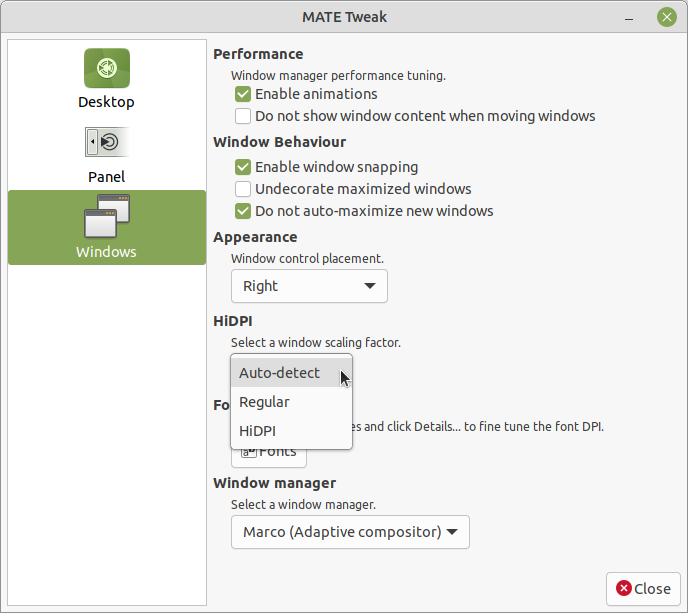
Choose the Windows icon in the pane on the left side of the MATE Tweak window.
-
In the HiDPI section, adjust the setting labeled Select a window scaling factor . Choose Auto-detect to have Ubuntu MATE automatically detect and set HiDPI window scaling when it detects a high resolution monitor. Choose Regular if you never want scaling applied. Choose HiDPI if you always want scaling applied.
-
Your new HiDPI settings will take effect immediately. No need to log out!
0 comments:
Post a Comment